To better understand what it is like to have an uncorrected myopia, let us consider, briefly, what the optometrist needs to measure during an eye check up. The optometrist determines your acuity, but at two distances, one near and one far. These two acuities help he optometrist gague, roughly, the nearest and farthest you can focus clearly using your accommodation. These two points are called the near point and far point respectively. To get a sense of your near point, hold your hand in front of your face and move to to the closest you can see it clearly. As you age, the near point moves farther away and when it gets too far to read comfortably, you are said to have presbyopia. The far point, hopefully, aligns with infinity, or it does not matter how far what you are looking at is to see clearly. Now, it is not possible to really measure and infinite distance, but fortunately, if you can see clearly at about 20 feet away you can see clearly at an infitite distance. Given the way our eyes are built, there is little difference in the focusing strength needed at 20 feet and at infinity. That is why Snellen acuity is given as some number over 20, e.g, 20/20 for normal acuity, because the bottom 20 refers to 20 feet.
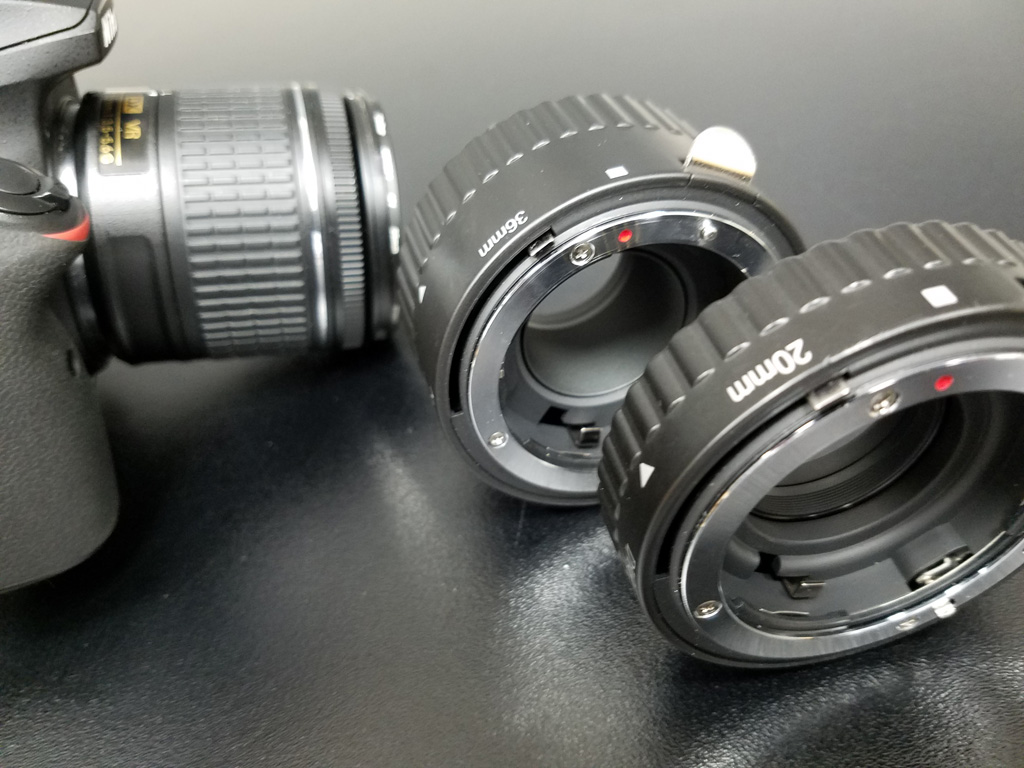
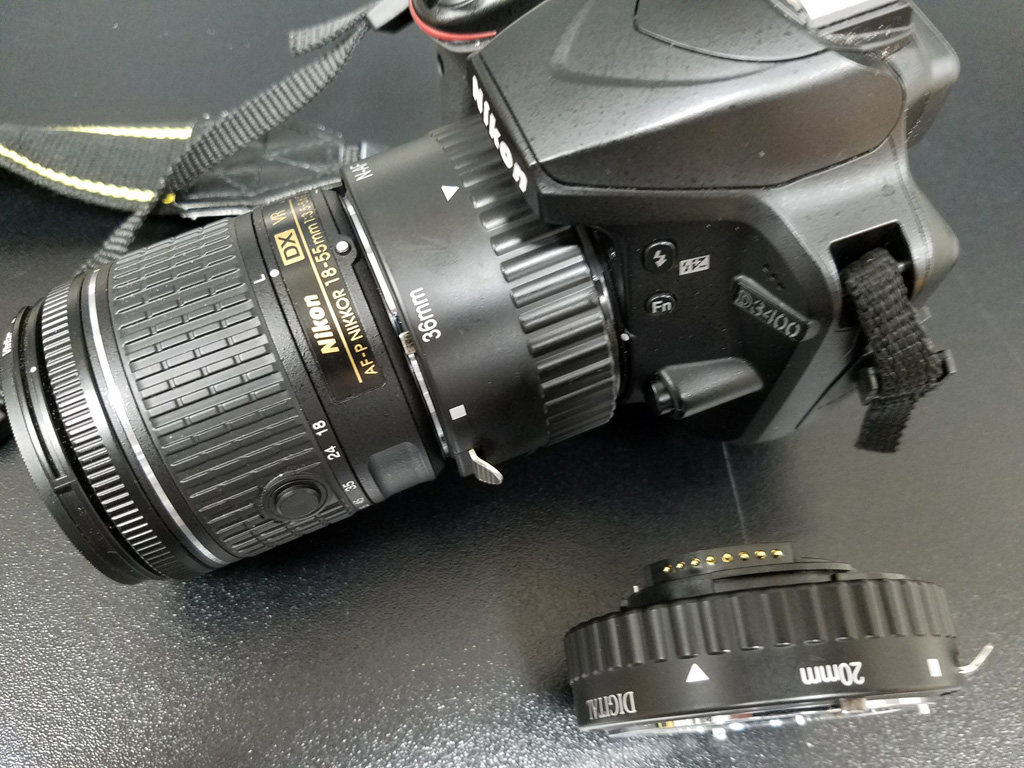
To help you experience myopia we will need to talk a little bit about cameras. Perhaps you have enjoyed extreme close up pictures like the one below. These up close photographs are called macro photography. There are different ways of doing macro photography, e.g, additional lenses, but we are going to only examine one that helps us with understanding myopia. Advanced cameras used by professional photographers are called DSLR and for our purpuse, the important characteristic is that you can remove the lens and place another lens on the camera. On a DSLR, one way to do macro phogtograph is to place an extension tube on the camera body before adding the lens. See the photographs below. The first photograph shows the tubes next to the camera with the lens attached normally. The second photograph shows one tube attached to the camera. What you are doing in this form of macro photography is placing the lens to far from the image sensor that captures the image. In other words, the lens is now too strong for the camera. This change is exactly what happens in myopic eyes. The lens is too far from retina for the strength of the lens.

So how does this change the near point and far point we talked about first? The lens is now too strong, it wants to focus in front of the camera or eye. When the object is far, the lens will produce a blurry image. But if the image is close, the lens can weaken to allow the image to focus. See ISLE 3.13. Correcting Myopia and Hyperopia for a fuller explanation of myopia. As a result, the near point gets closer. If you are myopic, think of how close you can hold a book to your face and still read it when your glasses are still off. The bigger change is with the far point. The far point is no longer an infinite distance, but that is only part of the story. Remember, in the human eye, 20' is essentially the same as focusing on infinity. Well, depending upon your degree of myopia, your far point moves within this 20 foot distance. Just a little myopia changes the far point from infitity to less than 20 feet. With a stronger myopia, the more the far point is within the 20 feet distance.
In this activity, you can compare how a myopic and normal eye can see the same object, a piece of amythyst, at different distances. The object will start from nearer than the near point to beyond the far point of the myopic eye (camera lens). The standard eye (camera lens) is the camera just with the lens so that is an emmetropic eye. The myopic eye, and there are two levels of myopia, is the same camera and lens, but with one of two sizes of extension tubes, 20mm and 36mm, between the lens and the camera body. These two extension tubes are shown in the photographs abive. By moving the object closer and farther you can see the differences in the near point and far point of emmetropic (standard) and myopic eyes. For the normal eye, as the object gets farther away, notice how the background eventualy becomes clear even though the object is still quite in front of it. At this distance, you are seeing the effect of focusing as far as necessary, the camera equivalent to the 20' discussed above. The distances from the camera lens to the object will be given. Do not that these distance are for the camera and will be different for actual eyes.
To see the illustration in full screen, which is recommended, press the Full Screen button, which appears at the top of the page.
Below is a list of the ways that you can alter the illustration. The settings include the following:
Move object closer: Changes images so that the object is closer to the camera, if possible.
Move object farther: Changes images so that the object is farther from the camera, if possible.
Move object to closes position: Resets position of object to the position closes to the camera, 2mm.
Animate: At one second interval, changes position to the next farthest position. The animation stops
when the farthest position is reached.
Stop: Stops the animation.
Choose Degree of Myopia: Choose with degree of myopia to examine: Moderate (using a 20mm extention tube)
or Severe (a 36mm extension tube).
Pressing this button restores the settings to their default values but does not change the image.