Depth perception is built up from different depth cues. When looking at a photograph, which is flat, we infer depth from the cues available in the photograph. Take a look at the photograph below.

In the photograph, the moon is clearly behind the clouds because the clouds cover part of the moon. Recall from the text that this is the monocular depth cue called occlusion. However, since the photograph is really flat, you can cause the visual system to make a misinterpretation of the scene by controlling depth cues and angle.
Take a look at the next page and see a figure that might not be, quite, possible.
Could you build this triangle with your lego? Check the next page to see how this structure was created. This figure is called an impossible or Penrose triangle.
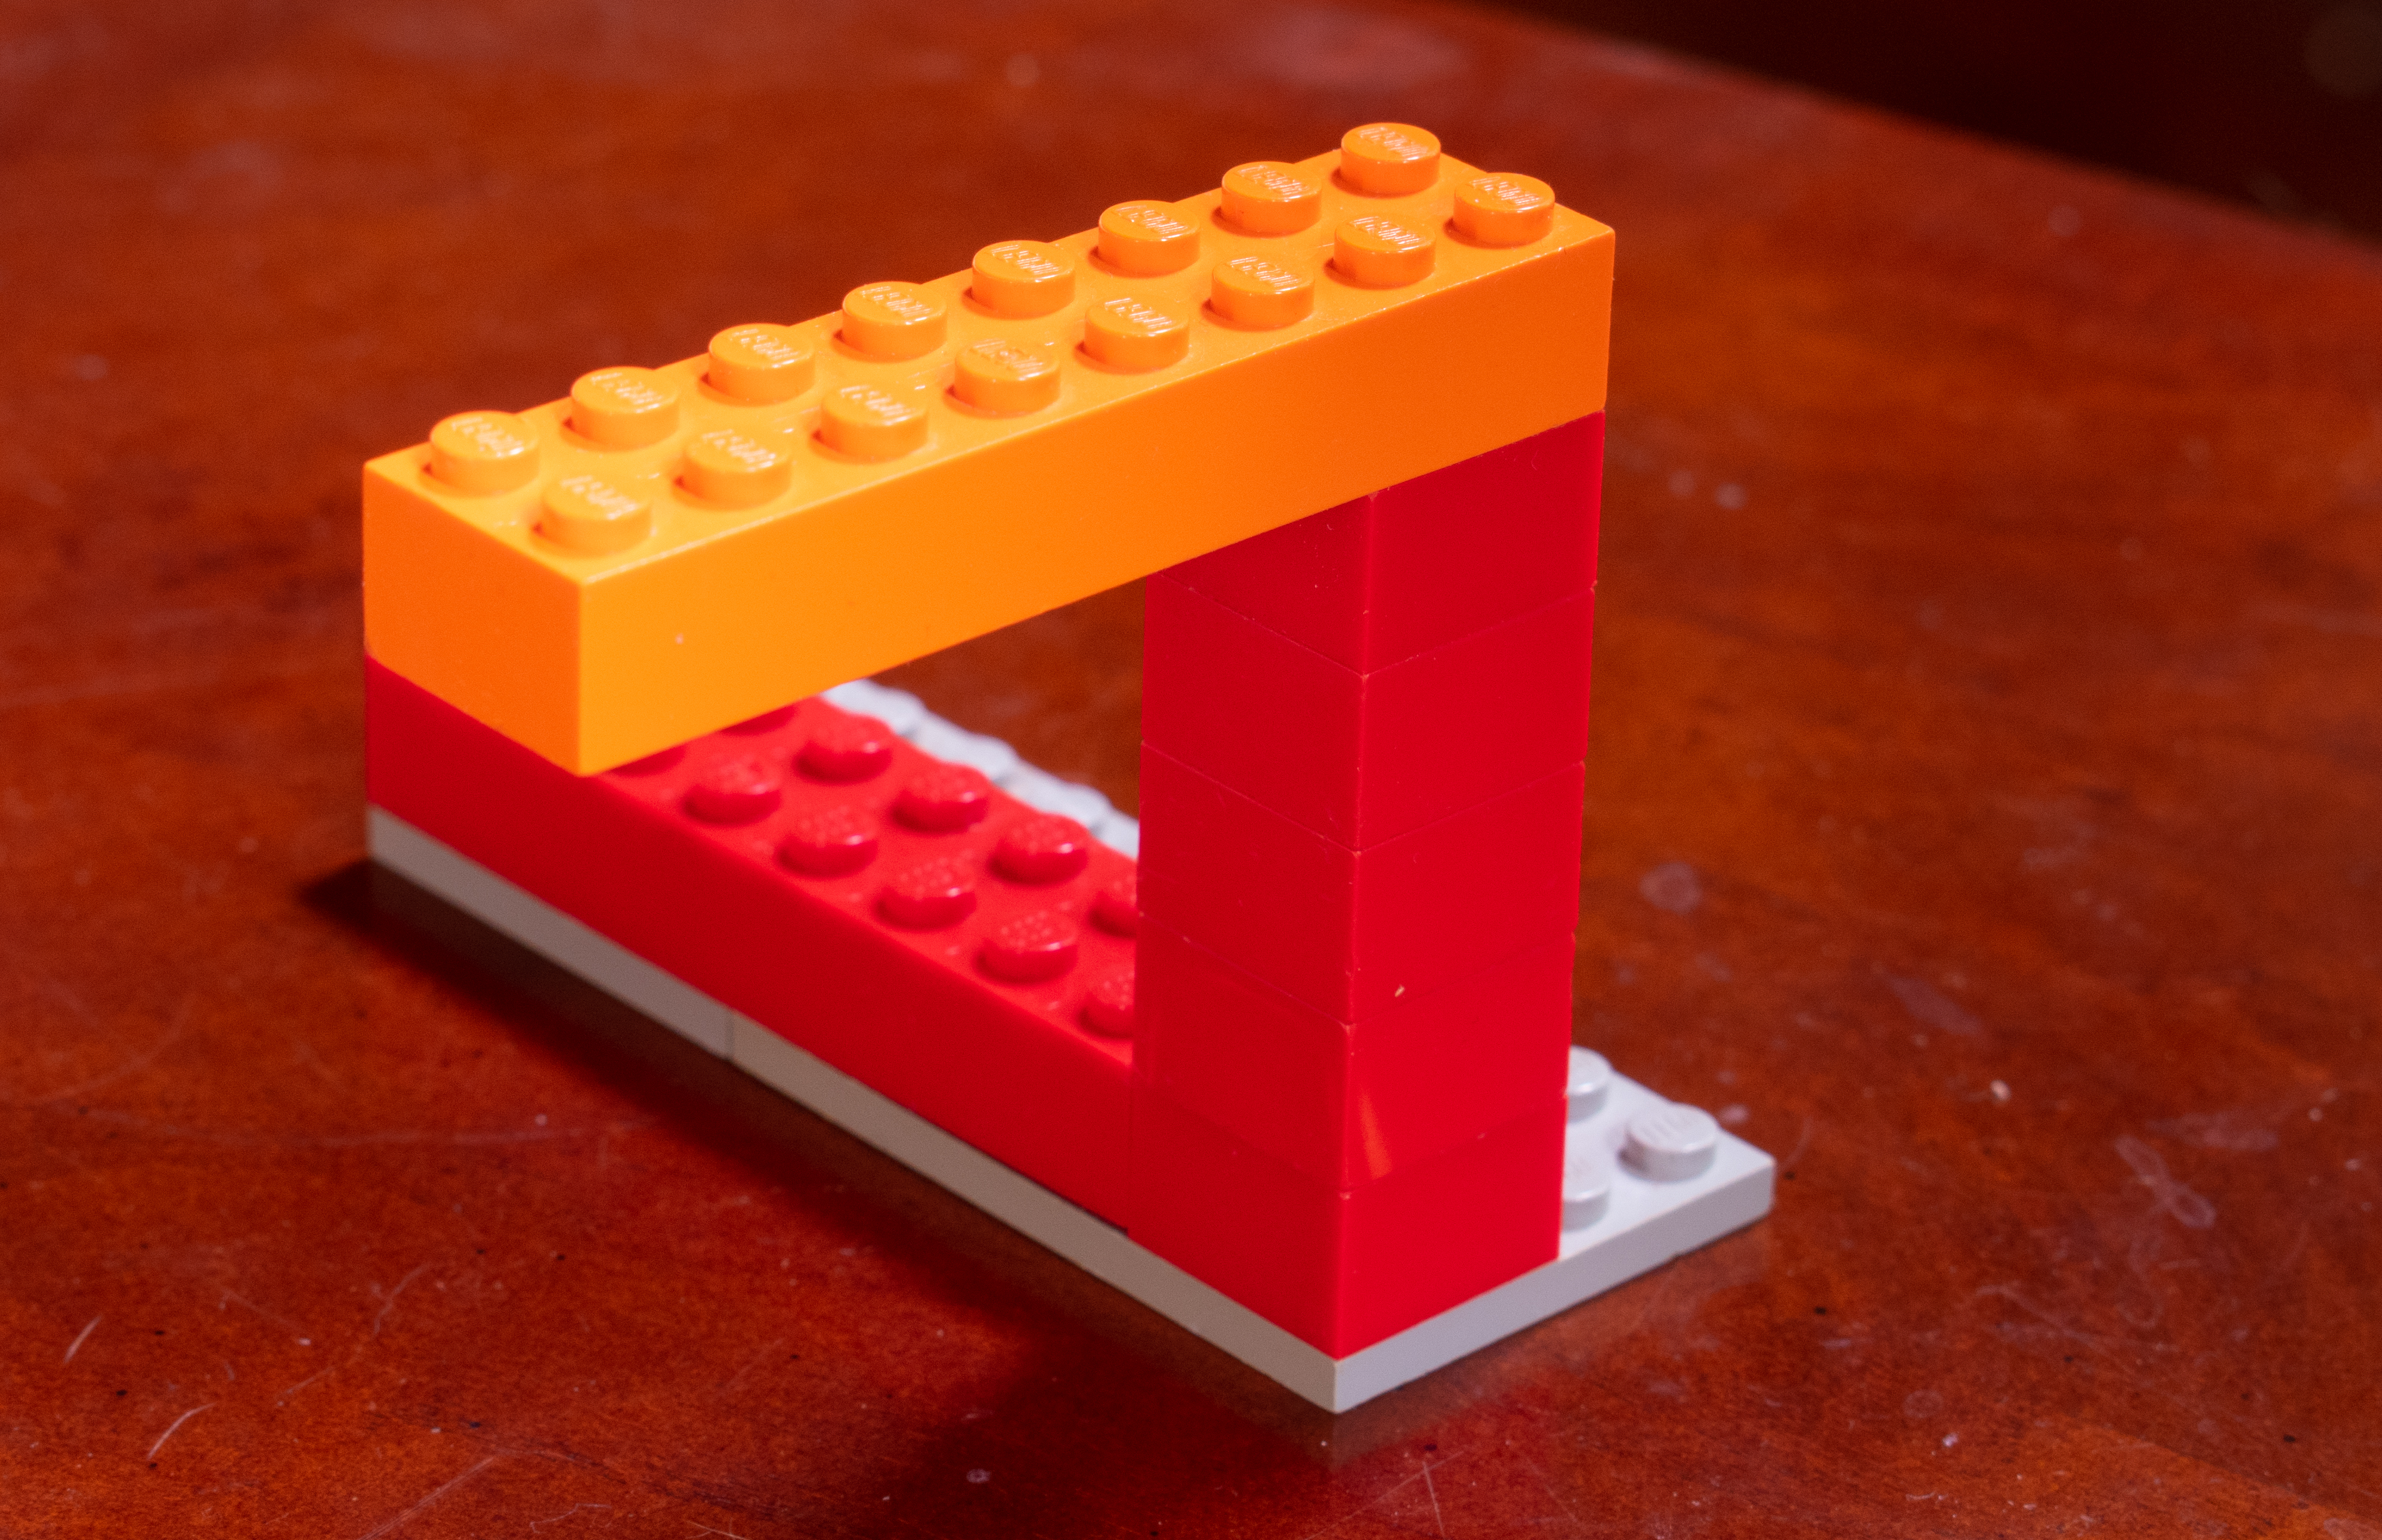
The photograph is really two dimensional. So the depth cues have to be inferred. See Chapter 7, particularly the discussion of occlusion and Figure 7.4 for a fuller discussion of this issue. However, breifly, since you are inferring depth from the photograph and you only have one particular view, the illusion is possible as the depth cues occlusion does not provide a strong perception of depth. The top bar covers part of the bottom bar and our brain perceives that the bottom bar is in contact with the top bar. Review the illusion below.
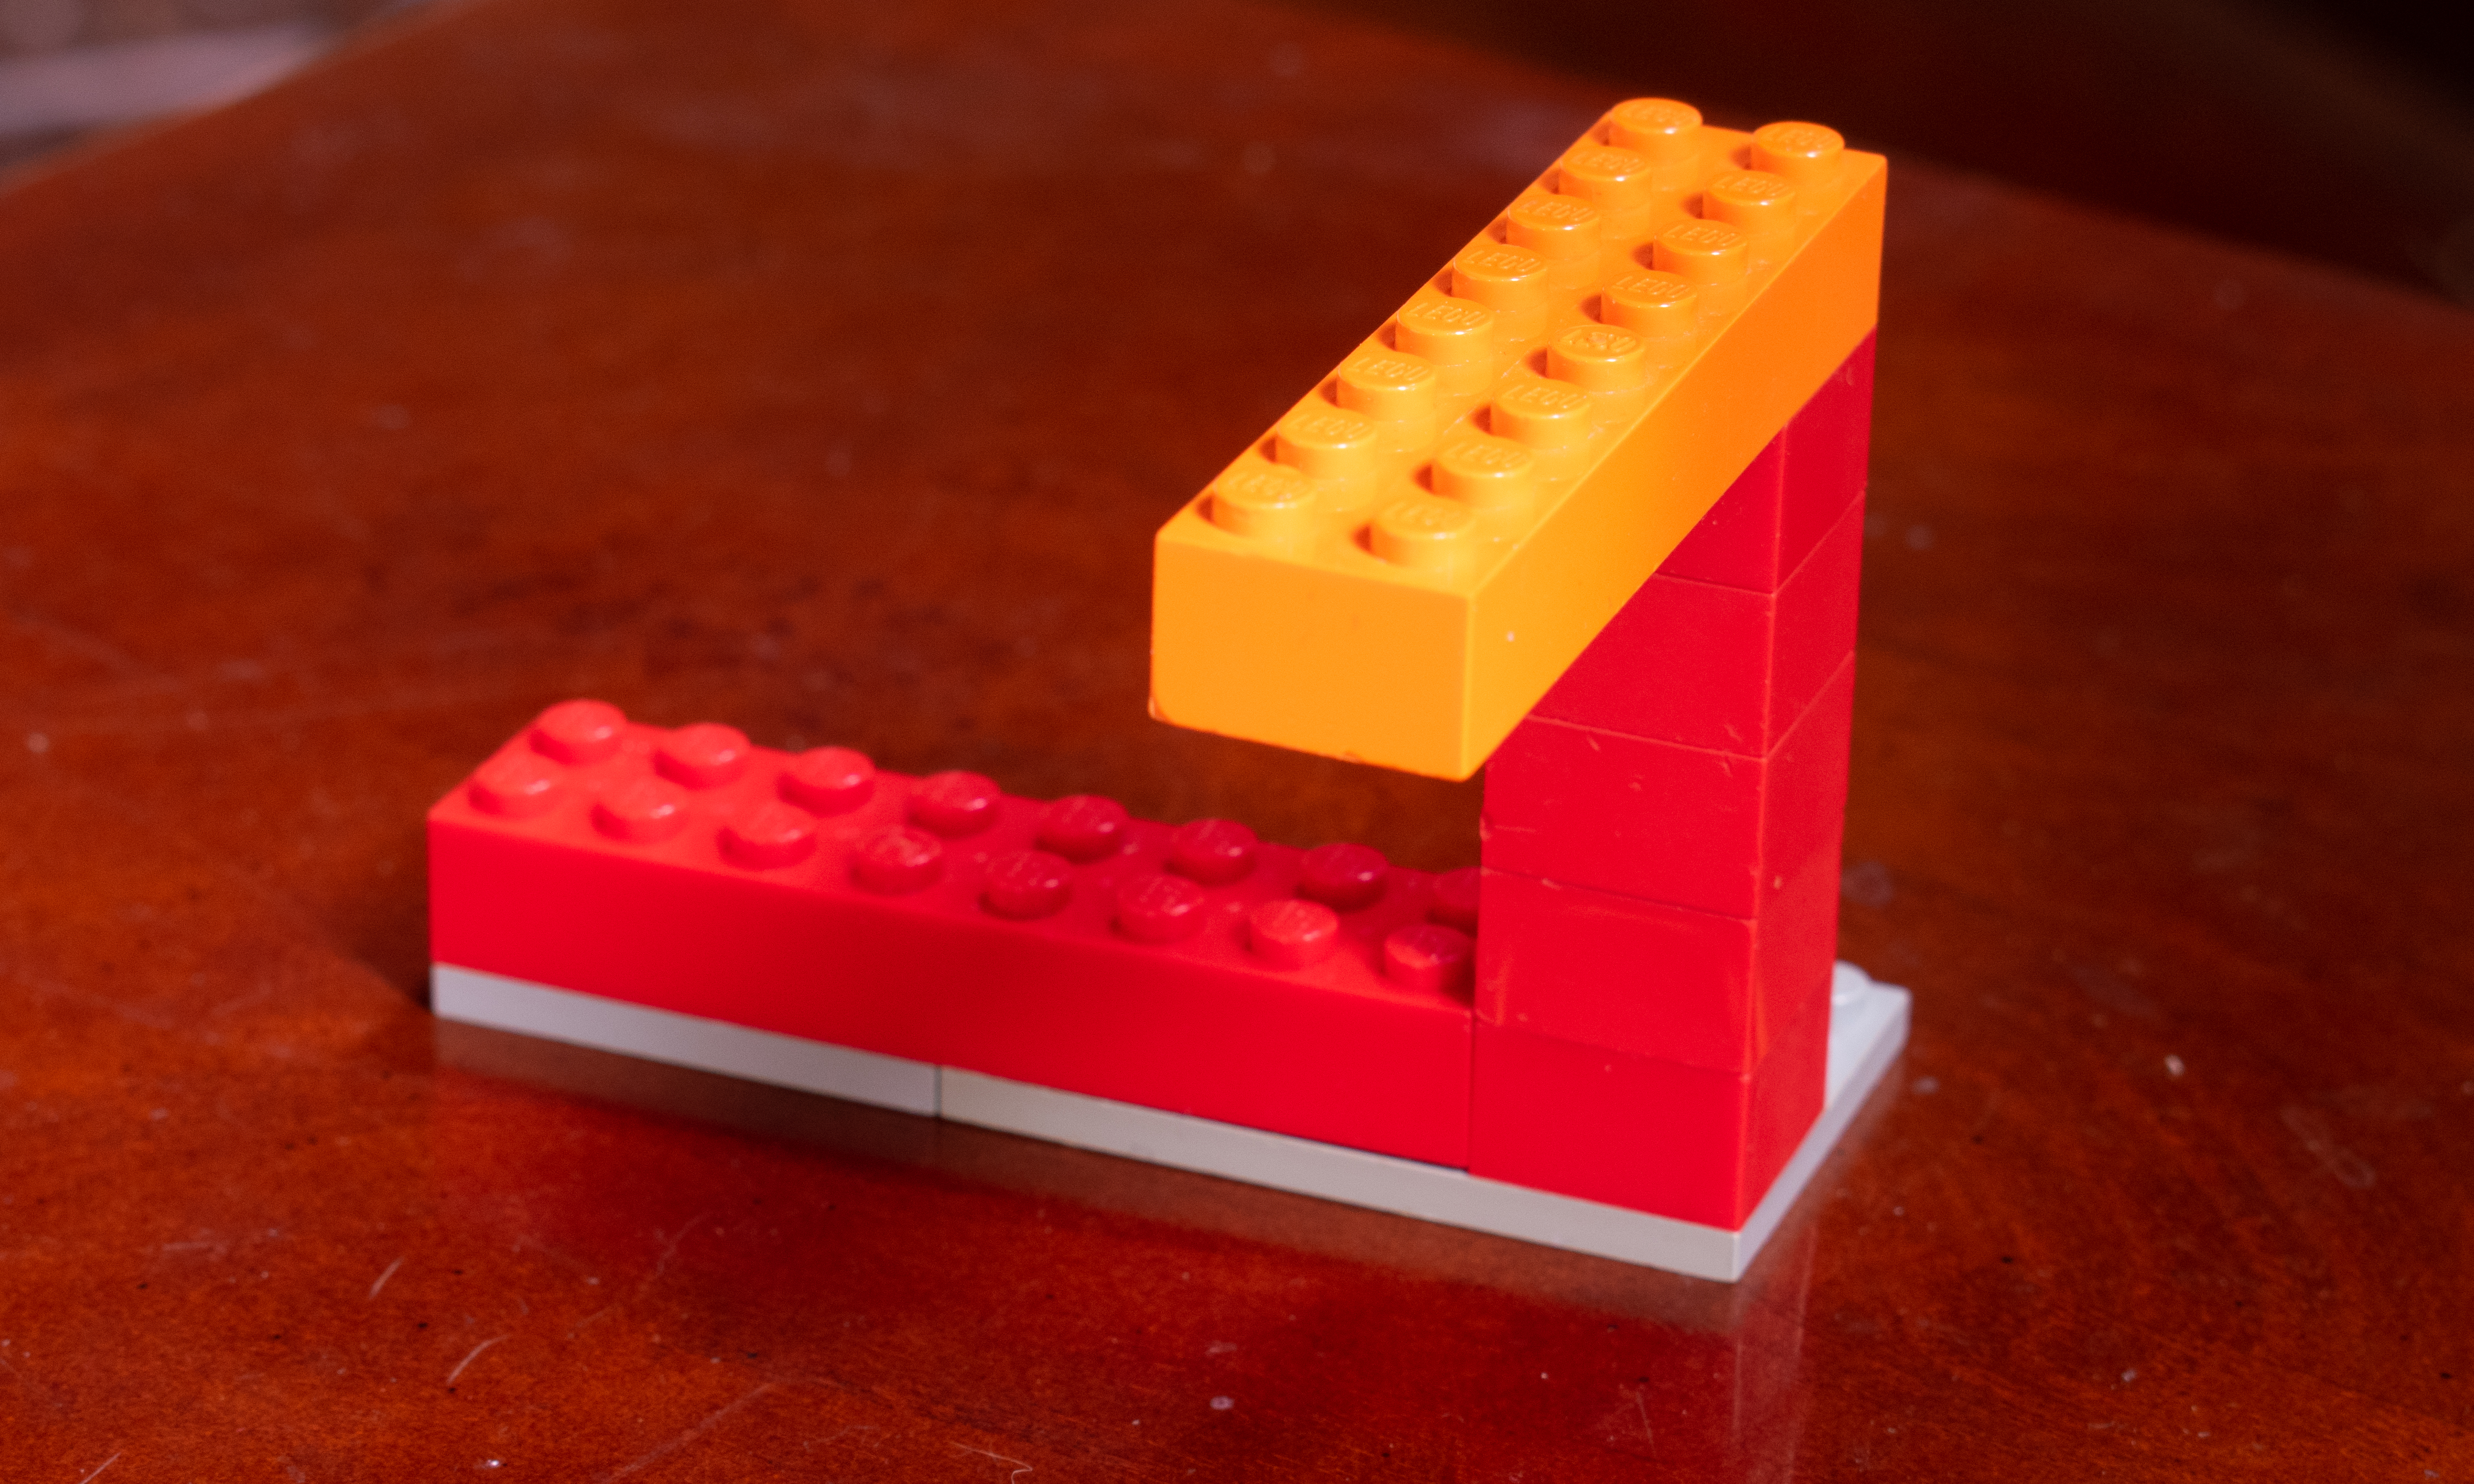
If I shift the camera to give you a new view you can see that the top and bottom bar are parallel and never touch. The illusion happens from the limited depth cues and very selective point of view of the camera. Believe me it took a long time to get the camera even approximately in the correct spot.
These directions are modified from this video.
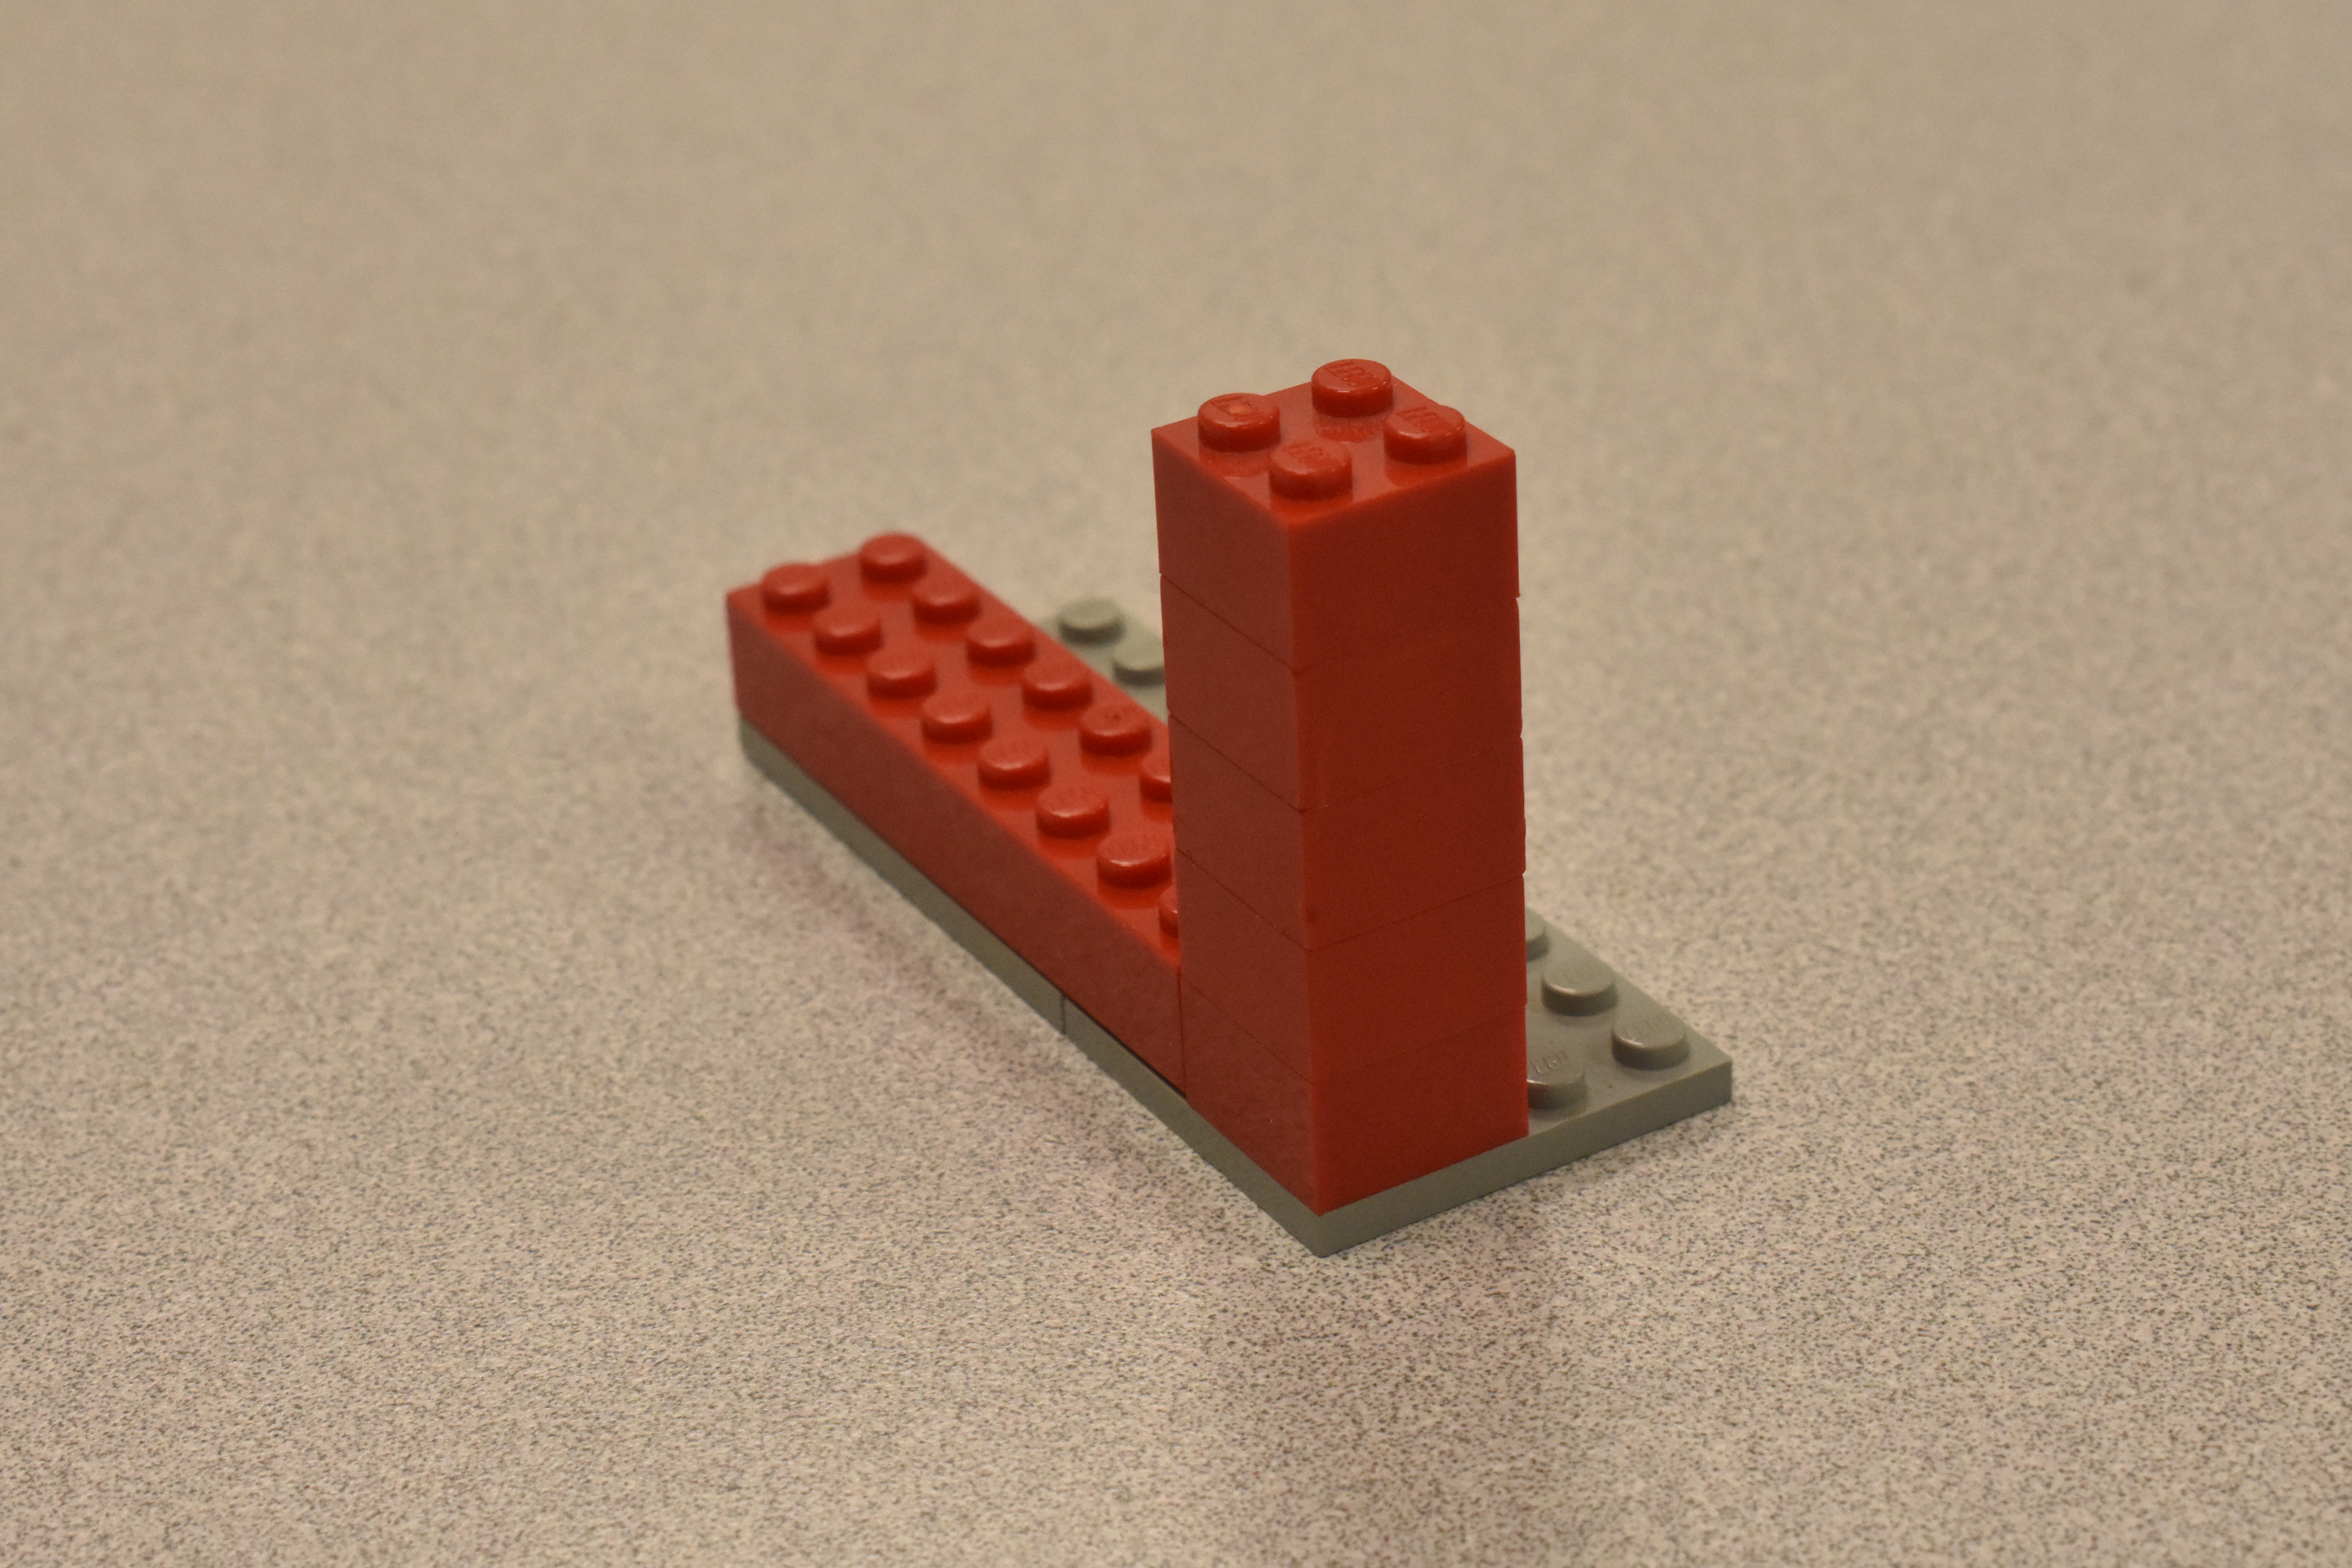
What you Need
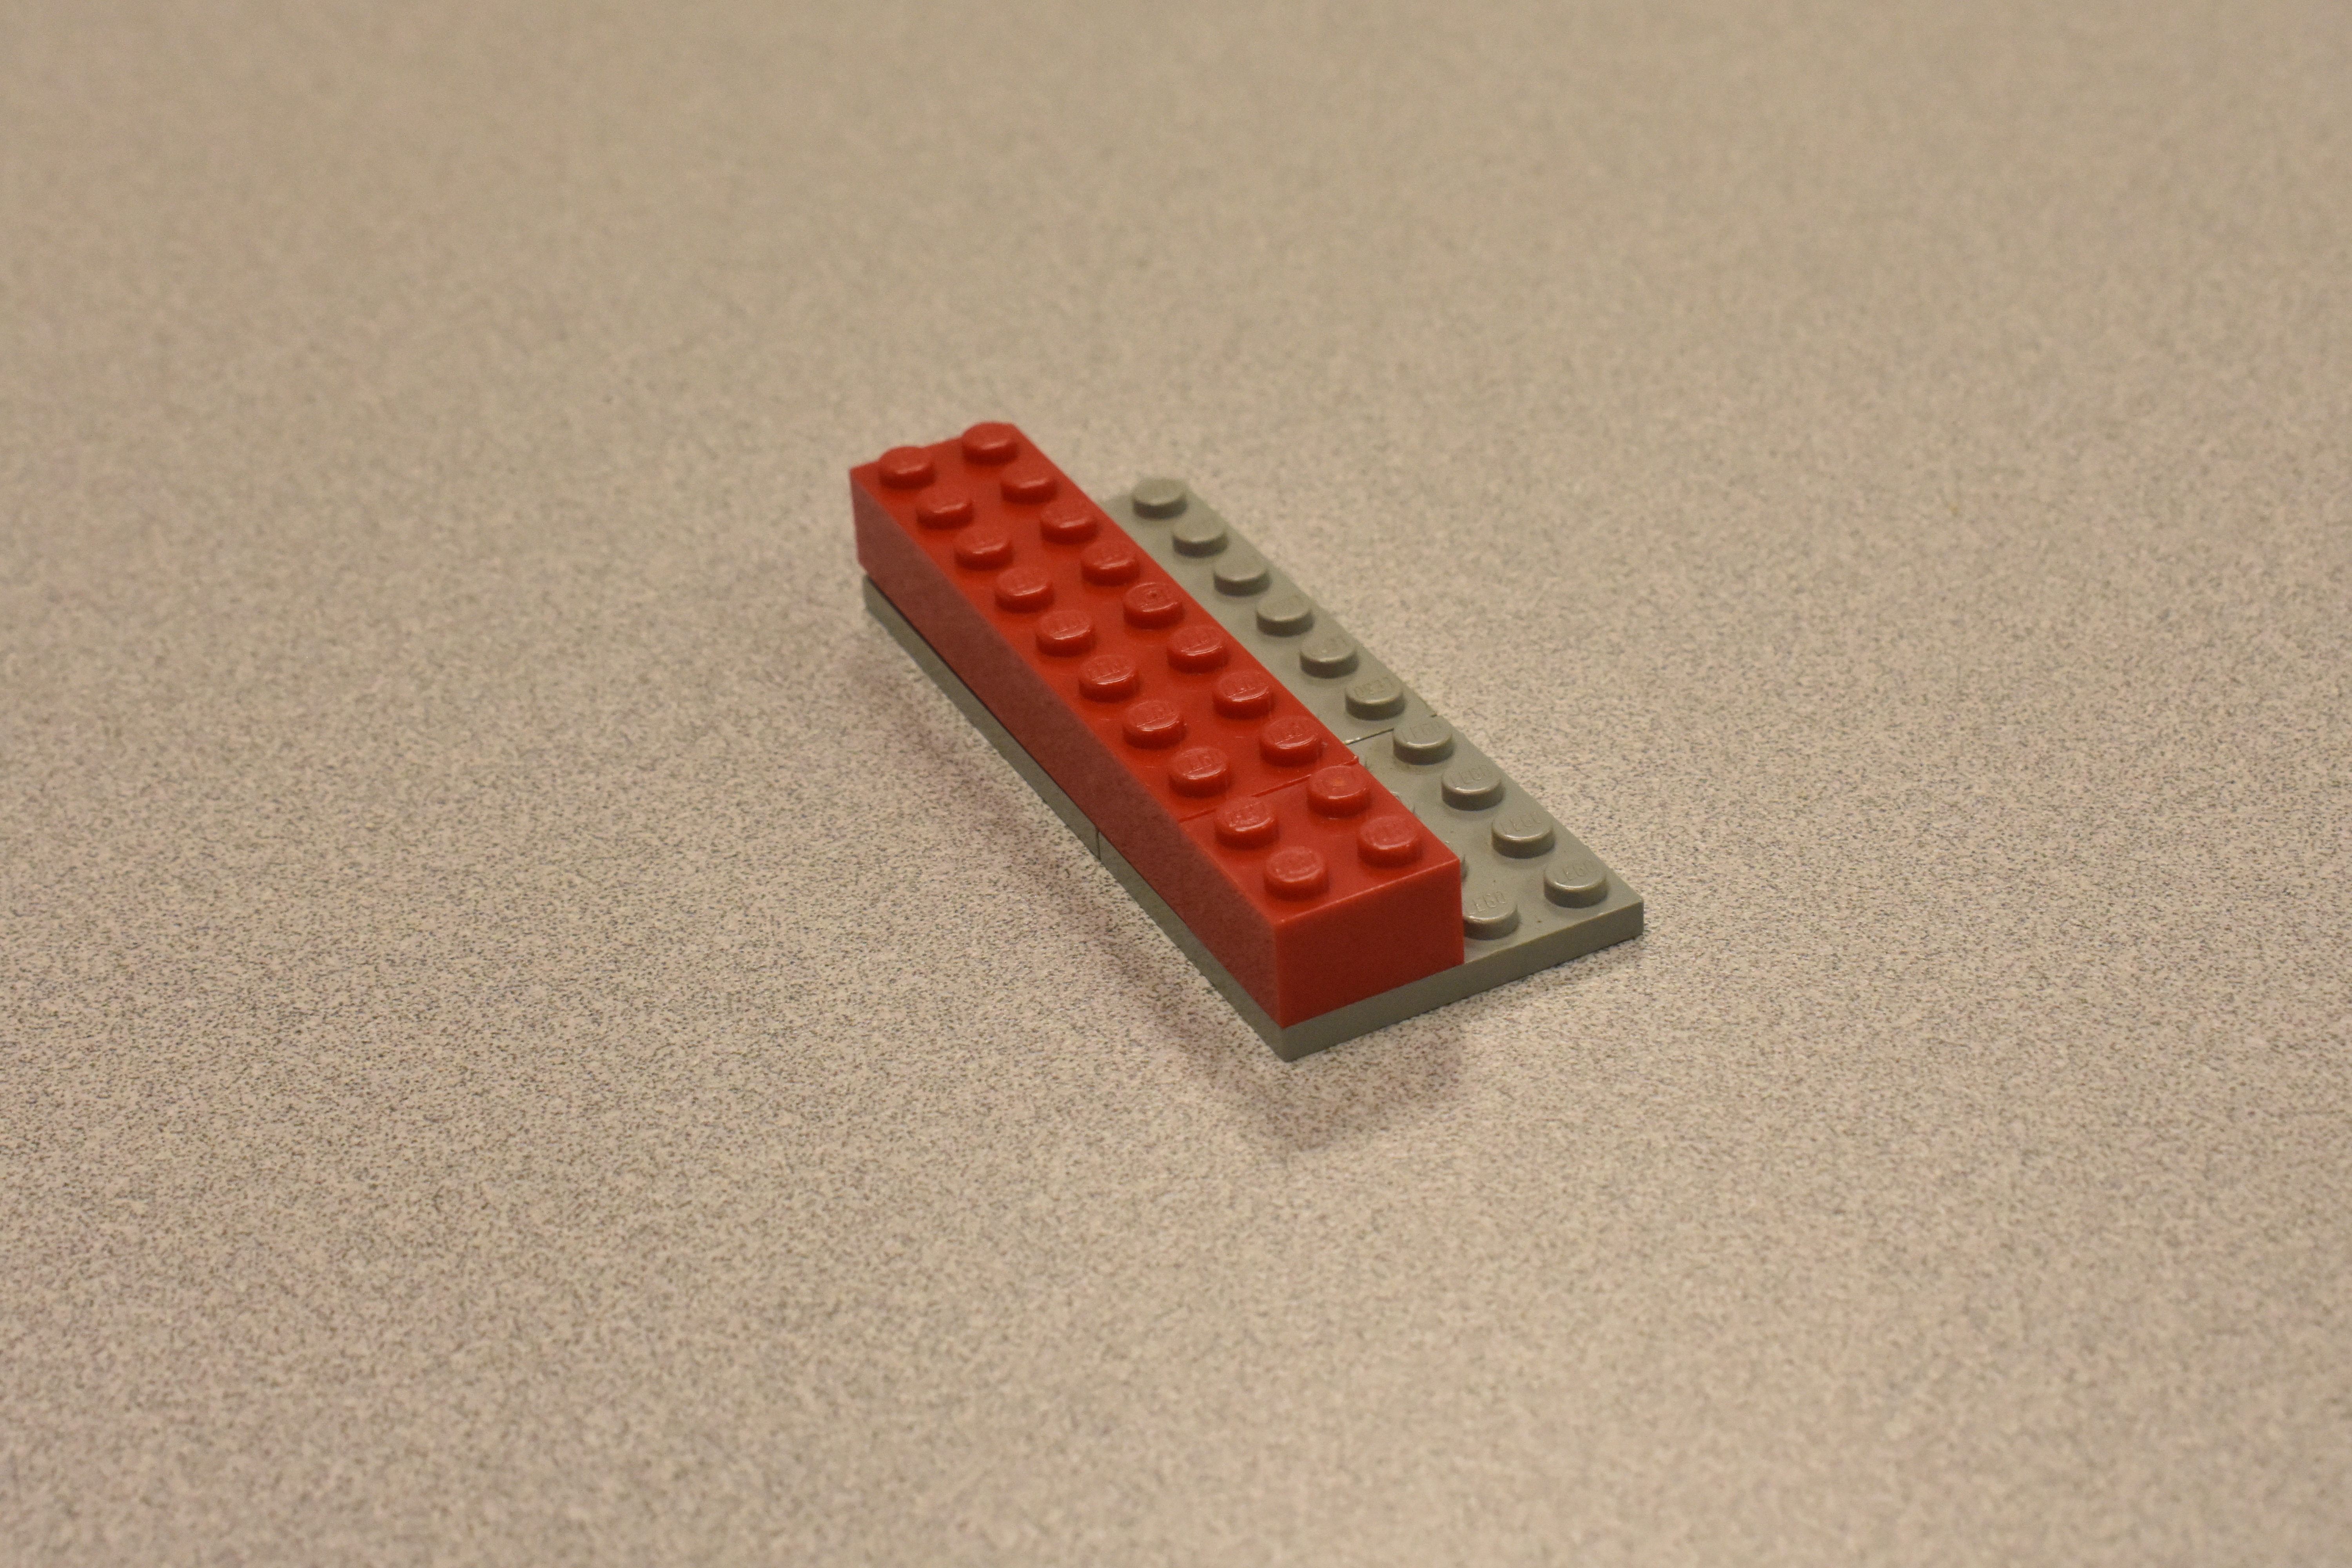
What you need are the following types of Lego pieces (all pieces are in the photograph below):
1 2 x 10 piece or combinations that make this size. I used a red 2 x 8 and a red 2 x 2.
1 2 x 8 piece. It has to be this size. I used the orange 2 x 8 piece.
4 2 x 2 pieces.
1 4 x 10 base (or something else to provide a counter balance)

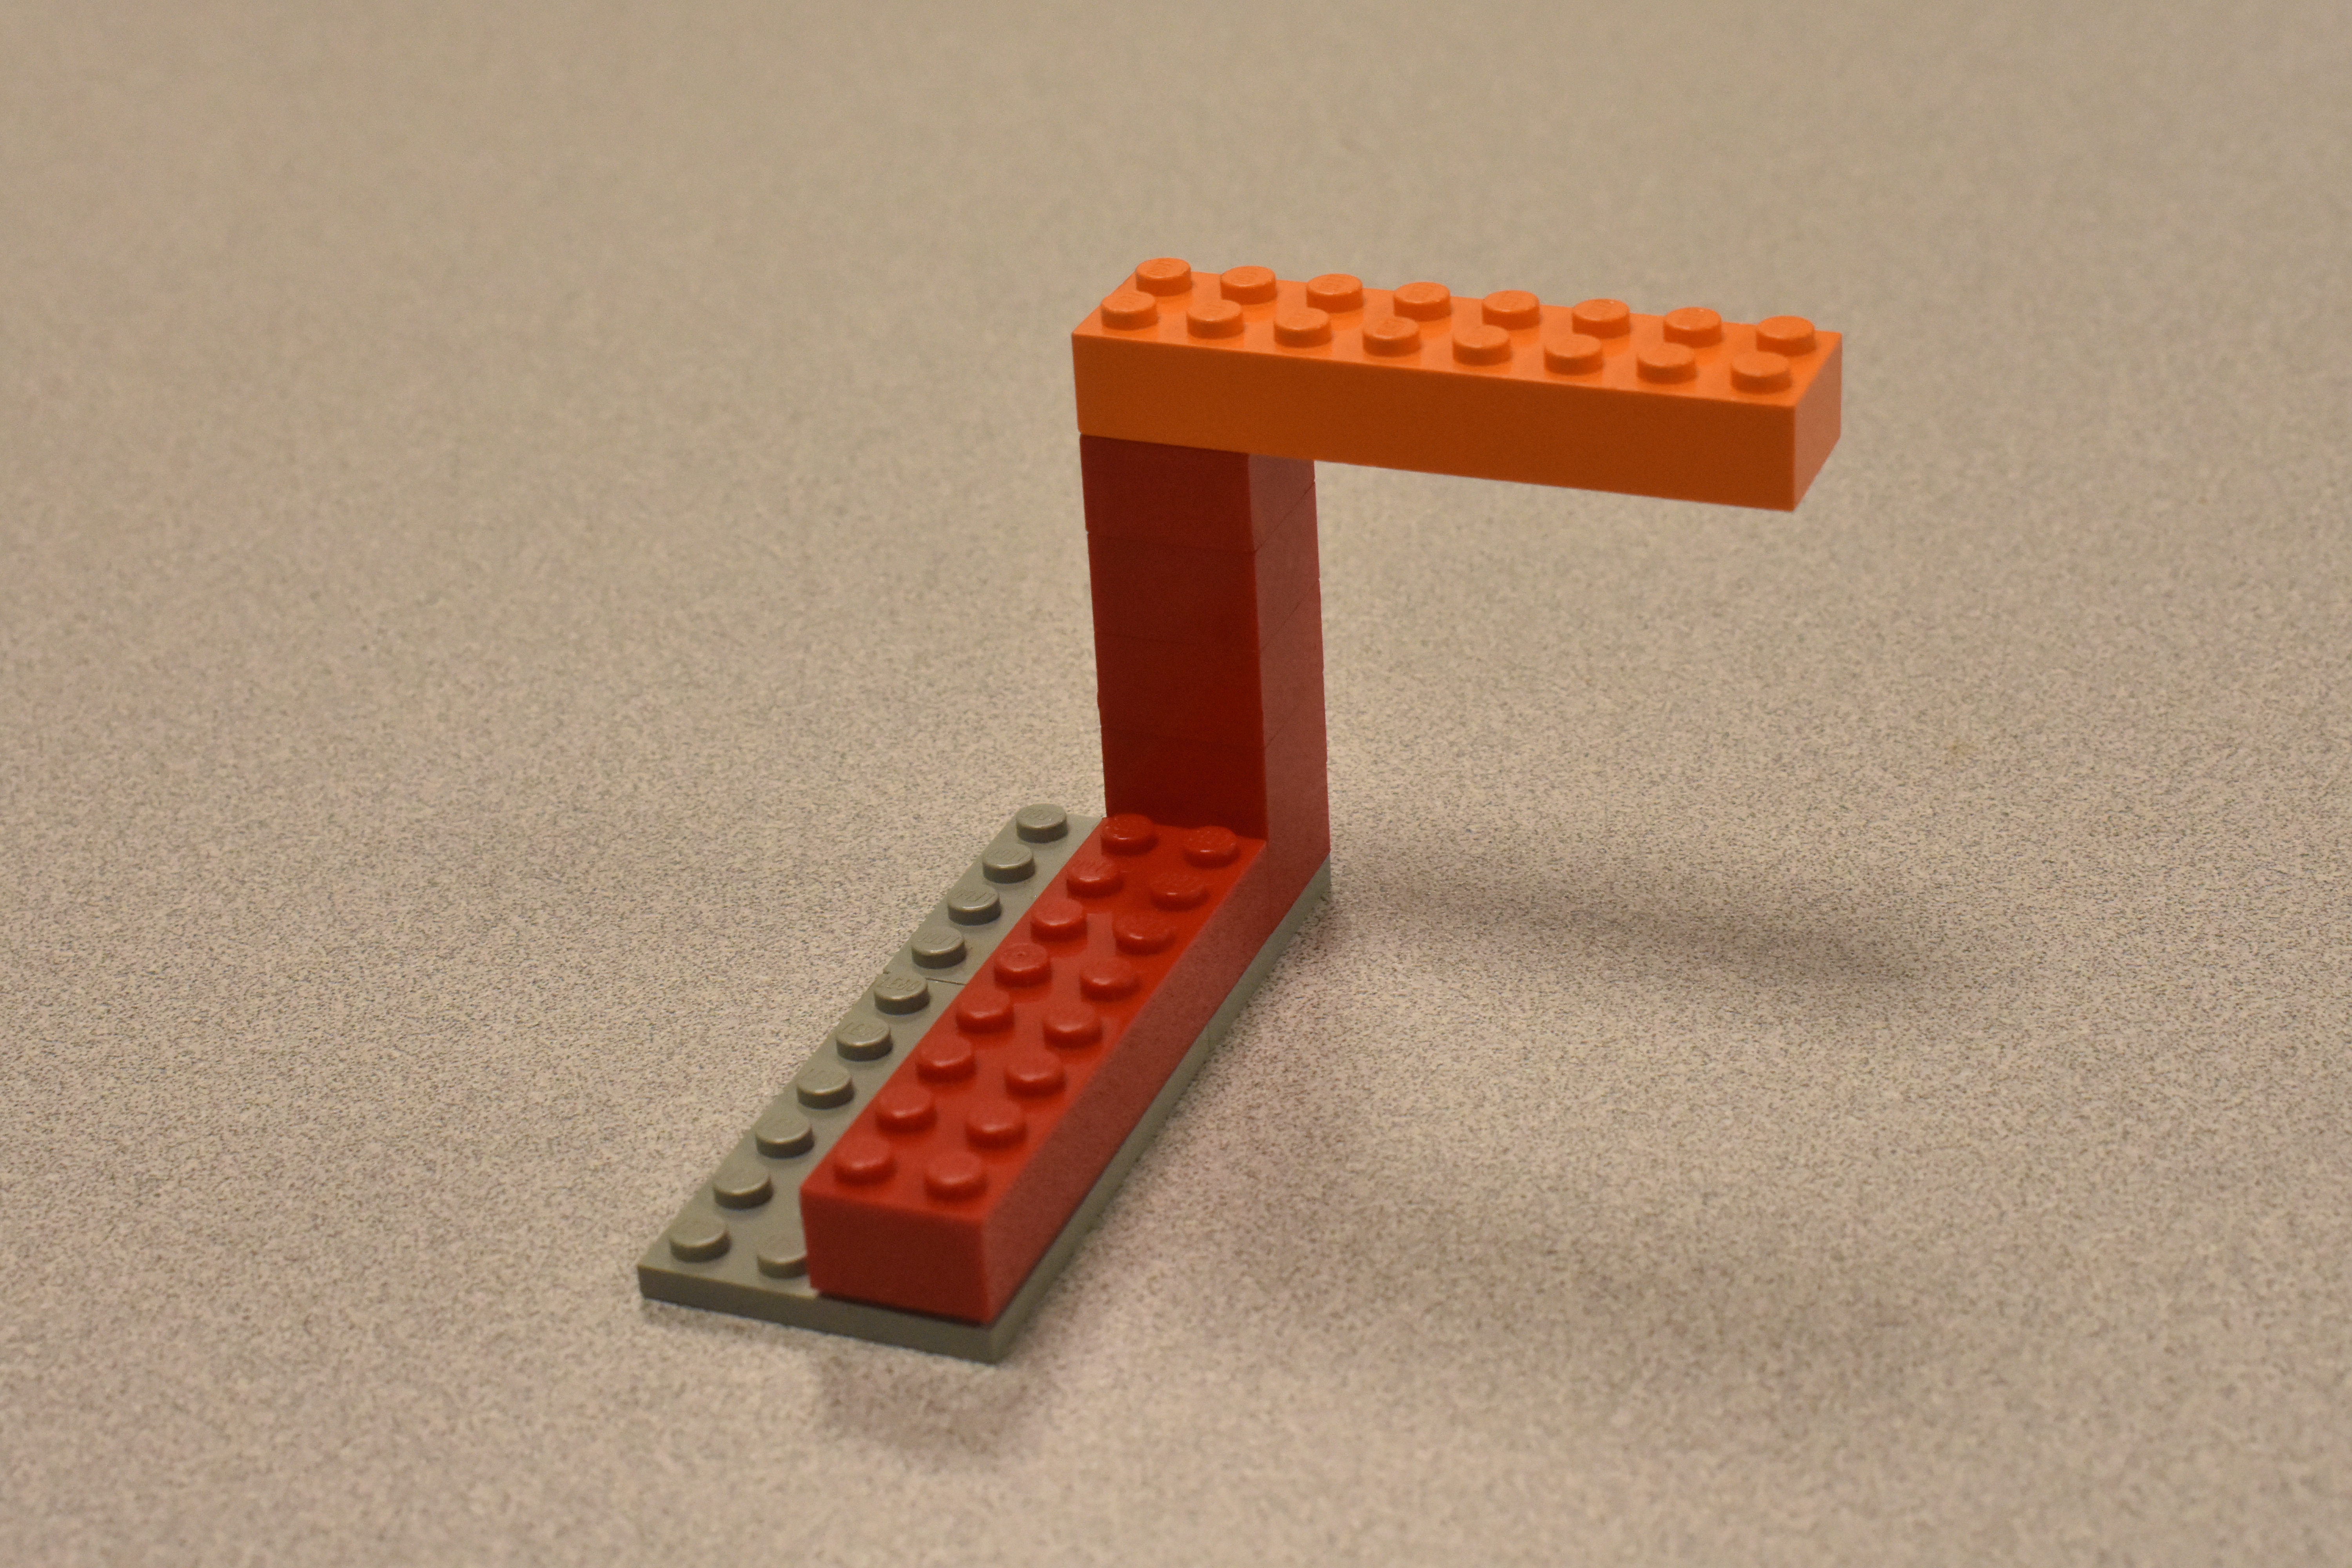
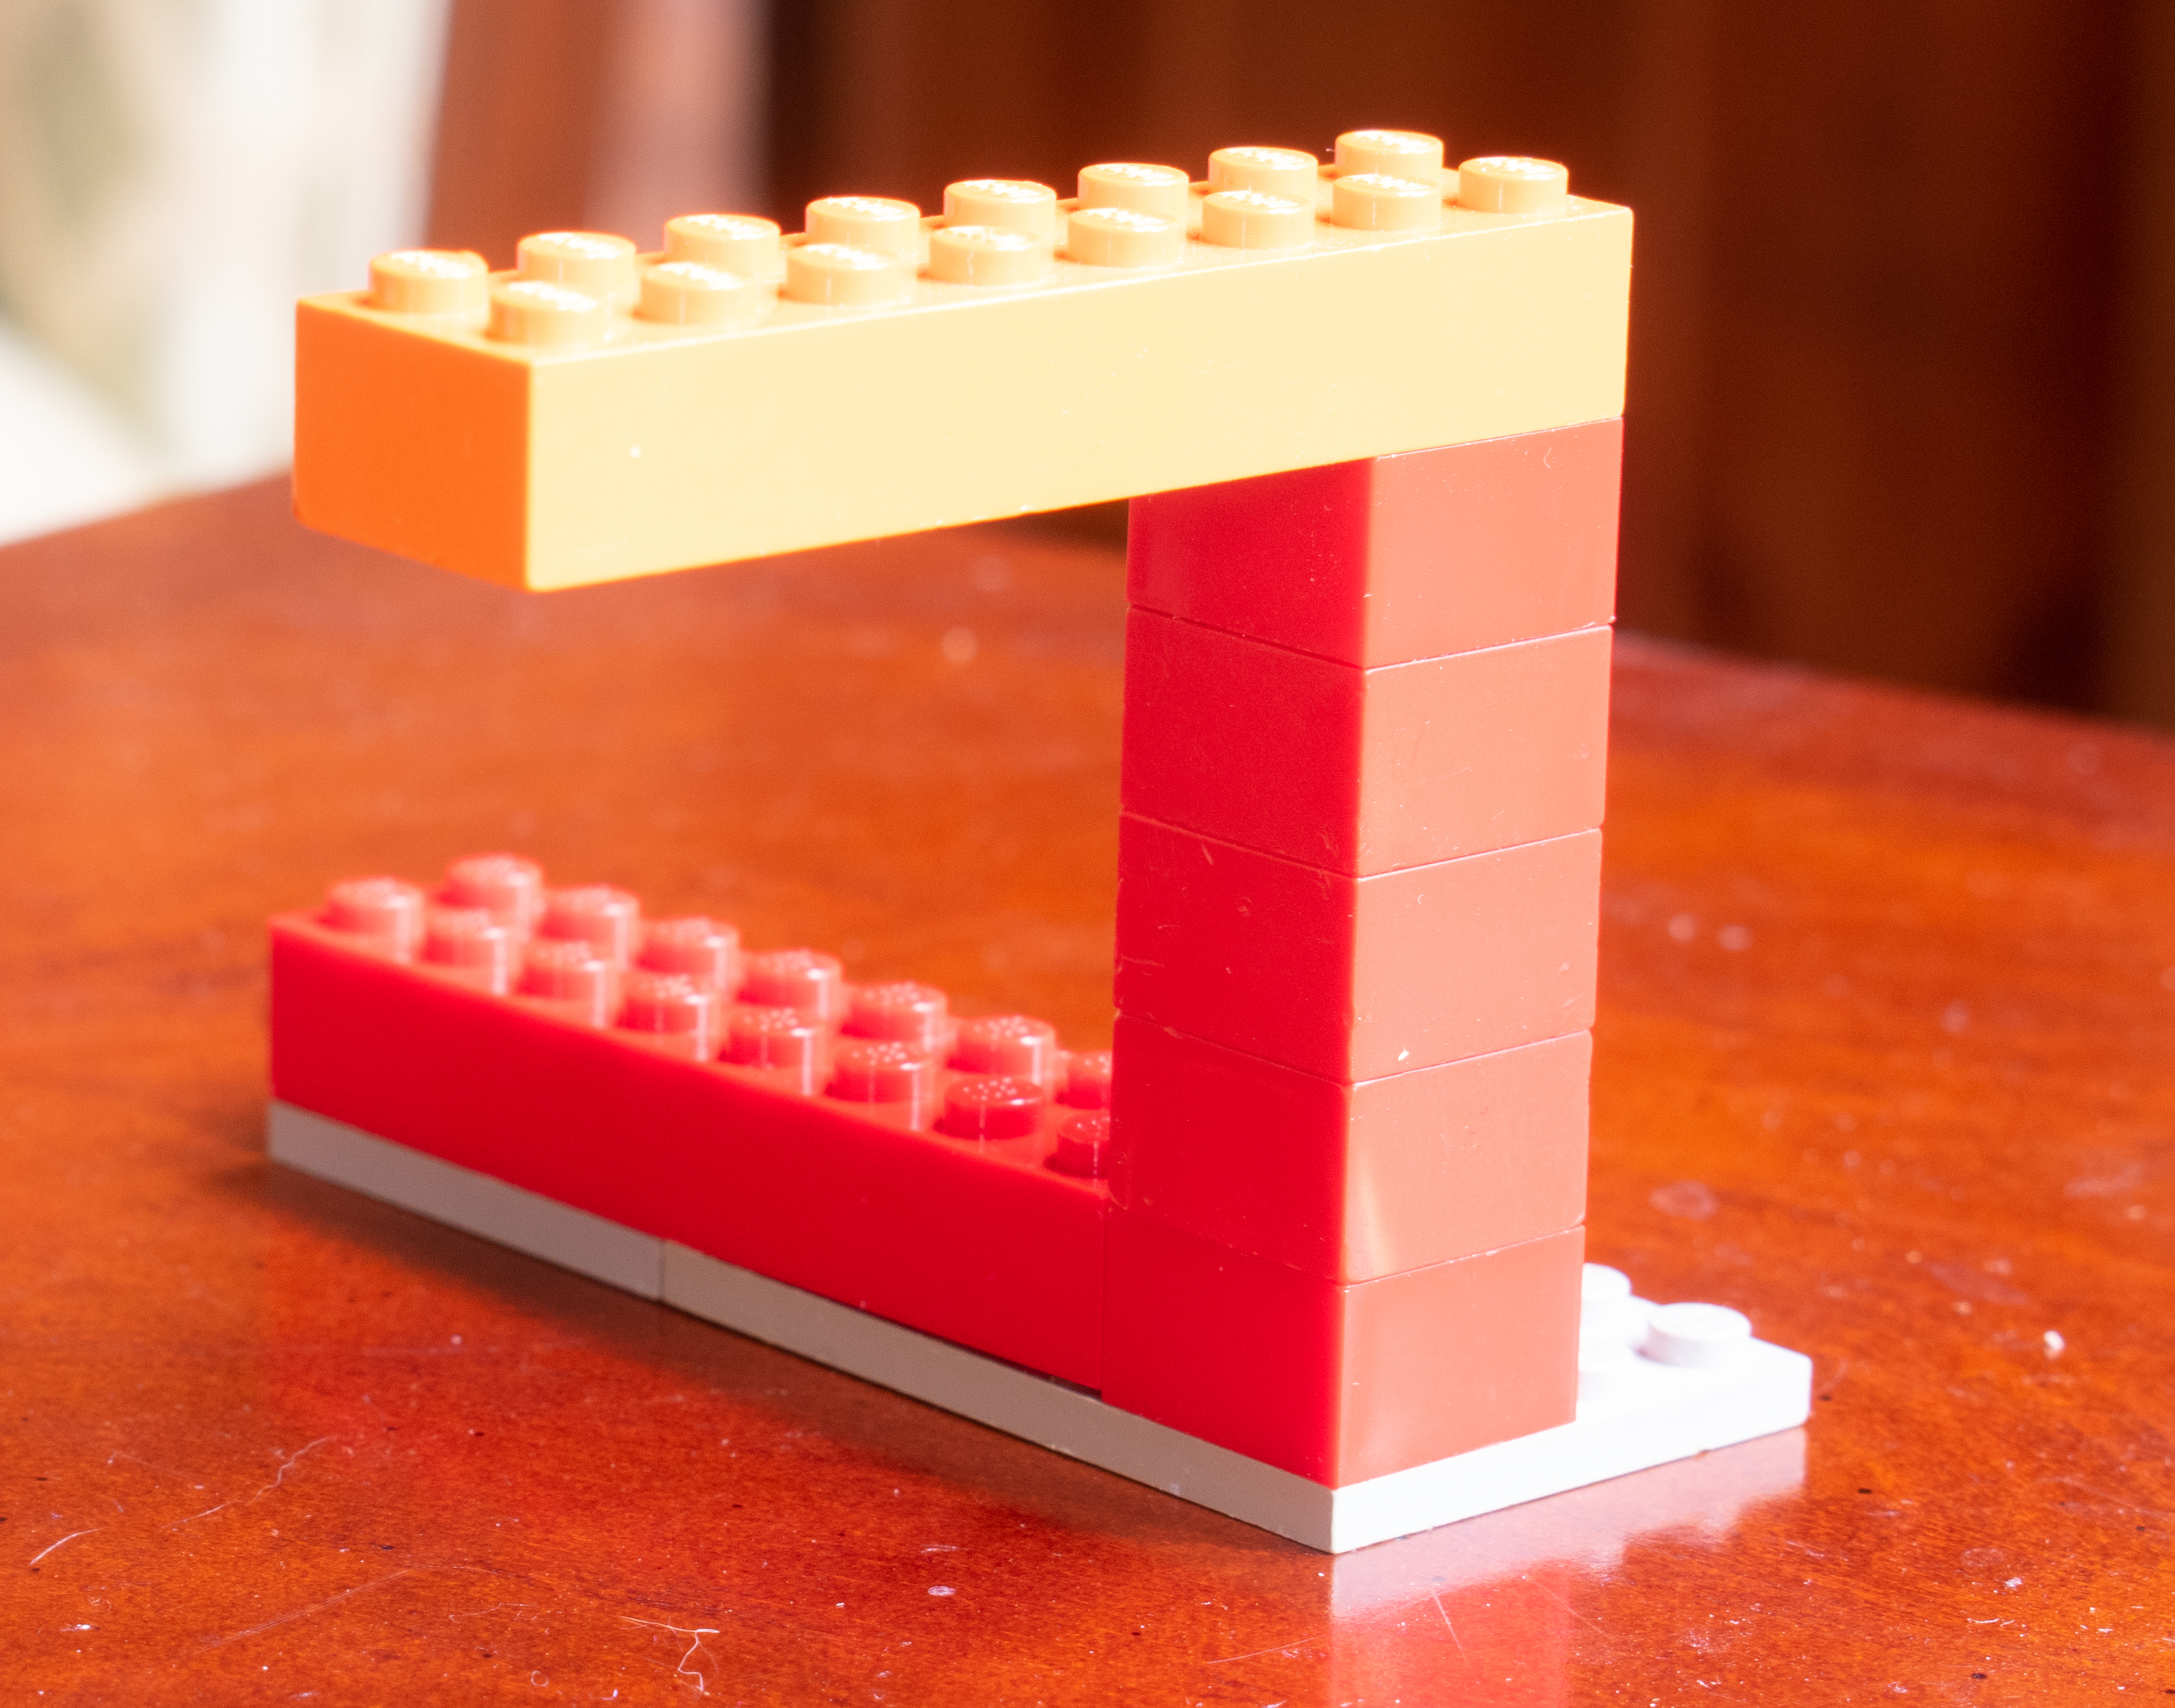
To photograph the image, you need to carefully align the camera carefully. Position the camera over and above the extended 2 x 8 piece. Move the camera up and down and left and right until the end of the 2 x 8 piece aligns with the top of the 2 x 10 piece. When you get it right you will see the image below. As you set it up, try to minimize the shadows which can limit the illusion.