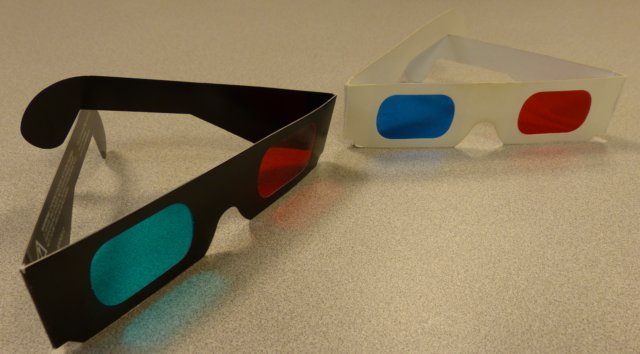
Some of the photographic figures in the text and on ISLE are anaglyphic stereograms, and they will require special glasses to be seen properly. See chapter 7 for more information about stereograms. While these glasses are not provided with the book, they are easy to make, or, if you prefer, cheap to buy, individually or in bulk. Please note that the images work best with Red/Cyan anaglyph glasses. An example of the red/cyan glasses is shown below on the left.
The Obtaining tab will take you to links where you can purchase these glasses as a reasonable cost. The Creating tab will give you clear directions on how to make your own glasses.
Here are some links on Amazon to purchasing these classes inexpesively.
Here are sets:
50 Pairs for ~$8. These are red/blue which work but do not completely match the red/cyan used on this cite. This link also provides different quanties.
American Paper Products This is a link to where you can request a sample pair of classes and get larger sets created for you.
Here are some links to get one or a few pairs:
Set of 3 Paper Red/Cyan Glasses
Single plastic Red/Cyan Pair. A little more expensive but might last longer.
These classes are easy to create. You can either use the links directions below to create a pair of glasses.
Here are links to directions. While both links are for red/blue glasses, the images in the text and on the site work better with red/cyan. Cyan is a blue green mix and can be seen in the right eye (on the left) of the pair of classes shown right below.

A page hosted by NASA for creating glasses.
A page hosted by The Paper Project.
What you need:
Oak Tag which is sturdy poster board but holds up better. You can use anything similar.
Scissors
Clear tape
Pattern for glasses (pdf) Sheets of red and blue acetate (available at art supply stores)
Steps to build glasses:
1. Download and print out the glasses pattern.
2. Cut out the pattern, including eyeholes, for your 3D glasses and tape or glue the sides to the center section. You now have your stencil for the actual glasses.
3. Trace the stencil on the Oak Tag or other sturdy poster board. Cut the glasses out making sure to also cut out the eyeholes. It is helpful to bend the edge of the ear pieces so that they will rest comfortably on your face.
4. Tape the red (left) and cyan or blue (right) acetate pieces to cover the eyeholes. Make sure to cut the acetate pieces a little larger than the opening for the eyes to give room to tape the acetate. Keep the tape off of parts of the acetate visible through the eyehole.